
This article will inform you how to create, edit or delete a zone in ZenduCam.
You will need to have administrator credentials in order to be able to do this.
Creating a Zone
Step 1) Login in to ZenduCam
Step 2) Click into Admin along the top
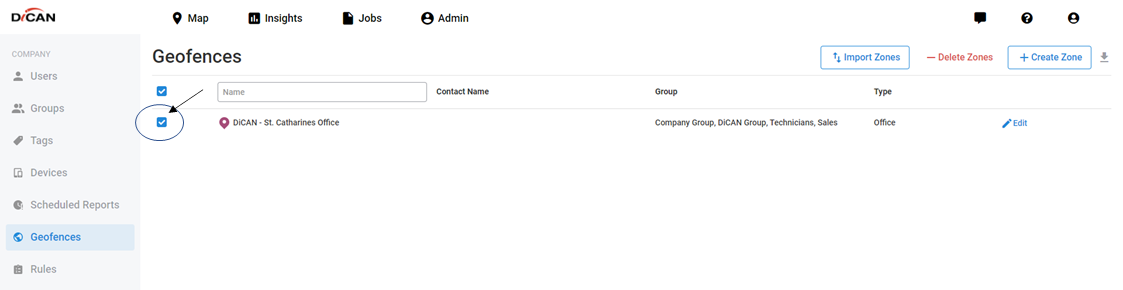
Step 3) Along the left hand side click on Geofences
Step 4) Click + Create Zone
At this point, if you have multiple zones it may be better to create an excel spreadsheet and + Import Zones, as opposed to creating each zone one at a time
Step 5) Select the type of zone this is (customer, office, home)
If this is a customer zone, an additional tab will be available to input customer details
Step 6) Fill out the remaining information, which groups you would like this zone applied to, the Name you want to call this zone, the address and the radius around this address, you can even set the colour you would like.
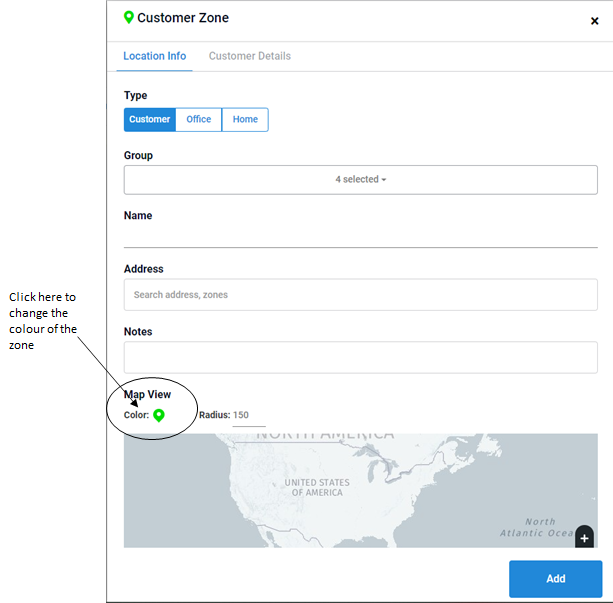
Step 7) Once you are satisfied with this information, click Add at the bottom
Editing a Zone
If a zone already exists but you need to modify it, follow these steps:
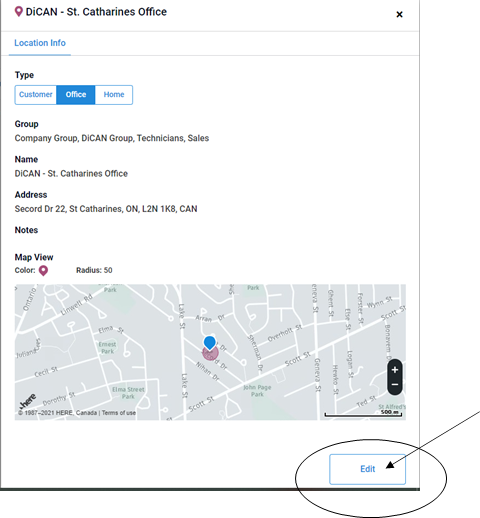
Step 1) Click edit on the right side, beside the zone that needs modifying

Step 2) Click edit at the bottom of the pop-up, this will enable you to edit any information that you need to
Deleting a Zone
If you no longer need a zone, or a zone was created in error, follow these steps to delete:
Step 1) Click the check box beside the zone that you wish to delete
Step 2) On the right side, the - Delete Zones should now be available to select
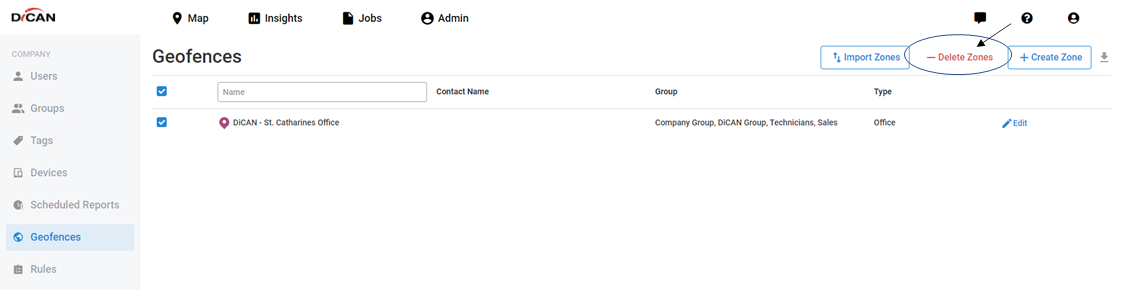
Step 3) Confirm that you would like to delete the zone, once this is done the zone should be removed from your list.
